Alright, you must be the kind of person who likes food with some heat! Get yourself a sheet pan or any other pan that can go in the oven and let’s make your peppers into dried chili flakes! We won’t be using high heat to dry here, so as long as it says “oven-safe” you’ll probably be OK using it. Even some foil made into a make-shift bowl or pan will work. Get ready for your house to smell like peppers! First, a tip for pepper gardeners.
Step 1. Pick your peck of peppers so the plant grows more
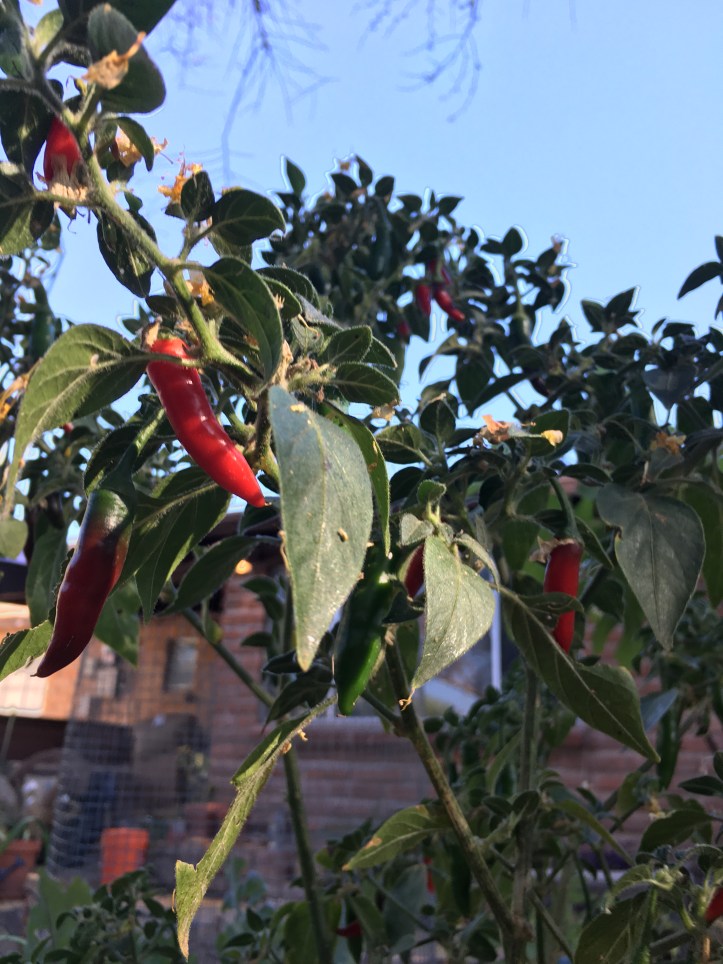
Make sure to pick the entire pepper, stem included, cutting with clippers as close to the plant stem as possible. Intact stems left behind trick the plant into thinking there’s a pepper there still. It will be pumping energy into taking care of the picked pepper still. If the stem is off, you’ll start seeing new flowers within a few days, meaning more peppers faster!
Ok, on to the rest of this tutorial.
Step 2. Wash ’em.
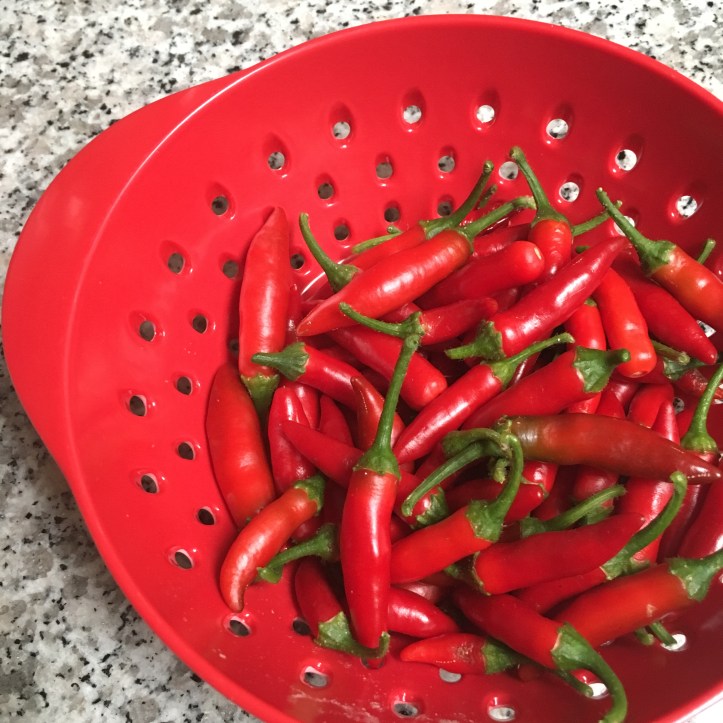
I throw peppers into a strainer, drizzle soap, mix around, and rinse. A sieve works well too. The ones I’m using are Sinahuisa peppers, about the size of your pinky finger. Bigger peppers can be washed one by one. Now just rinse and let sit to dry, or go right to step 3.
Related blog post!
Should You Clean Your Garden And Store-Bought Vegetables Before Eating Them?
Step 3. Cut ’em.
Any knife, any cutting board. Cut the ends off of each side of the pepper, stem and flower tip, and then cut into either rounds or in half, whatever you want.
You can not dry a pepper without this step. Drying requires you to cut them open so it dries down evenly. Leaving the pepper whole will just roast them and we only want them dry. There will be a change in the flavor either way, so no worries.
Do not oil them, that will burn the skin. We want everything to slowly dry out and not cook, at least not too much.
Once everything is cut and laid in the pan, move to step 4.
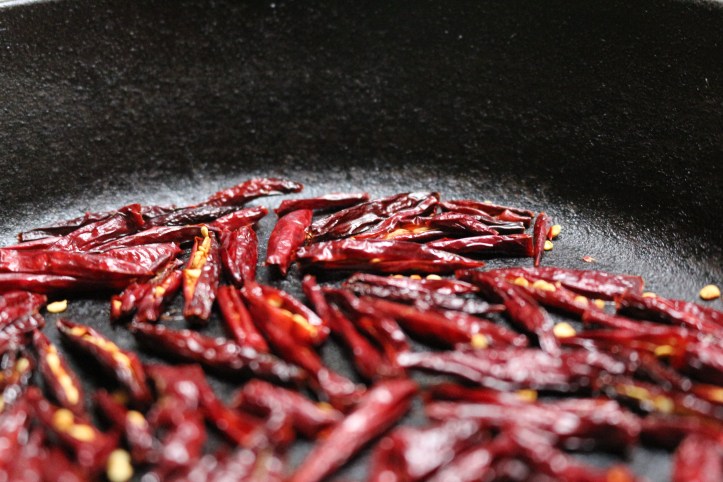
Step 4. Set it and forget it! Kind of.
Set the oven to 120F, and then set a timer for 3 hours. Oven is preferred, though dehydrator works alright. I use an oven because the heat will change the flavor profile. Play with different peppers to see which ones you love the flavor of! Do not leave the house or take a nap while the oven is on, especially with a gas oven. This is a dangerous
Step 5. Crush them!
Let your peppers cool to room temperature, anywhere from 1 hour (cast iron pan) to 10 minutes (aluminum foil). If they are in a cast iron pan, you can transfer your dried peppers to a ceramic or glass bowl to cool and the time will reduce drastically.
At this point, when cool, you can just toss them into a ziploc bag and store in a cool dry place like a pantry. Placing them into the refrigerator will expose them to moisture because cold air invites water vapor to condense on things and this will drastically reduce the shelf life of your harvest. Storing in an air-tight jar is also a great way to go.
Now, you can crush them using a few methods. A mortar and pestle works, but placing them into a thick plastic bag and hitting or tapping with a glass jar (GENTLY) works just as well. Shake the bag occasionally to allow the big pieces to jostle to the surface, making for easy targets. A mortar and pestle gives you more control for smaller pepper flakes. A small coffee grinder works perfectly for a fine chile powder! Just be sure to pulse it for large flakes or let it go to town for a powder. Be careful opening the grinder, the dust is potent and can get in your eyes and nose.
Now store on the shelf in darkness for up to a couple years! Smell the flakes for any change in the oils, some go rancid and should not be used. If they smell fresh, toss a pinch into homemade spaghetti sauce or mix some of it into coarse kosher salt for a spicy margarita!
Thank you for reading! How do you use chili flake? Let us know in the comments.
